Showing posts with label wreaths. Show all posts

Sunday, March 10, 2013

Pastel Spring Wreath

I love this time of year, I love Easter and I love all the bright colors that come with spring. I was shopping my local Target and found this adorable yarn wreath. 
I forgot to take a picture of the wreath by itself, with just the yarn. I knew I had to have it when I saw it. It was $12.00 and I could have made one myself but I knew I would spend that much buying all of the different yarns so I purchased it. 
It was a smaller wreath than I usually use so I decided to cut some burlap strips to add to the back. I hot glued them and made small pleats to give it a little fullness. 
Do you know the trick to cutting burlap straight? Simply pull a string all the way across where you want to cut and it will give you a nice straight line to cut. 
I made some flowers out of satin fabric. I used about 10 layers to get a really full flower and before I burn the edges I cut little slits in the circle. It makes them curl up and be more 3 dimensional. 
Here's another trick I always use a glue stick to hold down anything that has hot glue. I won't burn my fingers and the glue stick doesn't stick to the fabric. 
I love all the texture to this wreath, the yarn, the burlap and then the contrast with the satin fabric flowers. 

I just had the outside of the house painted so everything looks so nice and clean. I'm not sure I will get any other decorations up for spring this year but that's ok this brightens up the entrance and makes me happy.


Sunday, May 6, 2012

Working on a dream and stuff....

I've been sparse in blogland for a few weeks... for a couple of reasons. I've got to be honest here, the thing that got the ball rolling was due to the fact that we were without internet and cable for 11 days. Torture I tell you pure torture! I didn't realize how much I depend on those two things in my life. I also didn't realize how much I depend on you and again if I am being honest, my dependence had gotten to an unhealthy point. 

This is not unique to me, I've read about it on one blog after another, BUT I thought it was only happening to them, NO, never me. Turns out being without it for those 11 days showed me something different. So, I don't know where I am going with this. I wish I had some great answer, I love blogging and the friends I've made. I've often said it's a little like jammin' in a band, it's fun to have all kinds of new and different people to "jam" aka craft and share with. BUT!!!! it has become a place of feeling less than, why would I want to continue to put myself thru that? So, if you don't see me around here that's what up, trying to get some perspective and do what's right for me! 

The other thing that happened while without TV and internet is that I finally got around to making one of my dreams come true! I have dreamed for years of  have craft nights at my house with a room full of girls. I bring the ideas and supplies you bring yourself and a little cash to pay for the supplies and we'll have a great night! I launched my first idea out there last week and my class is almost full! 

I'm so stinking excited!!!

 I would really like to do this once a week but we will see where it goes. So another reason why you might not see me on here as much. I've got to come up with some fabulous ideas! Check out our first craft....

Isn't it cute? It brings a smile to my face when I come up to my front door everyday.
And by the way I want to thank all of you who stop by and comment and support me and have become friends, I really do appreciate that you spend your precious time looking at my blog!

Tuesday, January 3, 2012

Valentine Wreath Rerun

Valentine Wreath

This is a wreath I made last year, actually was a giveaway that I had. I have been getting alot of hits on it over the last few days so I thought I would share it again.

I made this out of a wool full length coat I got at Goodwill half price. The coat was intended to for stockings but I ran out of time, I had an even better idea for a Valentine wreath. Actually while out shopping at Christmas I saw a really cute flower on a necklace and that sparked an idea. I'm going to share with you how to make it BUT... maybe you won't have to if you win one.

Here is a tutorial to show you how to make your own. As I said I used a red wool coat but you can use whatever fabric you have, obviously the thicker the better, even red felt would work.
I suppose there are alot of people out there that simply see a red wool coat when they look at this and truly that is understandable but I see fabric, lots of fabric and do I have to tell you that makes me such a happy girl.
Then I see this, and I know it's half price on pink tags day and I get even more excited because that is alot of wool fabric for 5.00!!! As I mentioned you could do this with lots of fabric but I love the idea of using something old as something new and it really is hard to beat the price!
The first thing I did is started cutting the coat apart and cutting 2 inch squares, tons of them, gobs of them, sorry I didn't count them.
Then I took my small whole punch and punched a whole in each and every one of the squares. Ummm this project is a bit monotonous but oh so worth it!
I took a coat hanger and shaped it into a heart. Then simply started to feed all the squares onto the wire. (pardon this picture, I need a new camera, simple fact , most of these have been taken outside at least until it got dark)

 Once the wire was packed full I bent the wire with some pliers Then I dabbed a little hot glue on the wool squares so that you can't see the wire.

Another great find, it was a 1.50. A Ralph Lauren coat, what do you think Ralph would say about this. It was suppose to be the cuff on the stockings, but... well you already know that story.
I simply cut a circle, no pattern, just eyeball it, I promise it will be fine. See those little pearl things in the back. I bought a bunch of those after Christmas for a dime I think. I wish I had found more. 

Just start cutting like a snake or a spiral. Once you cut it you will wind it back up using the center part as the middle of your flower. Tuck the tail in behind your flower. I forgot to take a pic of this part but I glued the tail and then cut a circle the size of my flower, covered it with glue and laid the flower on it. I then glued in the pearl thingy, technical term.
These are so sweet! I also added a little satin ribbon for some shine. I cut the ends in a dovetail because it reminds me of bow and arrow for Valentine's.
Here is one final look. I don't think the pictures do it justice. Oh and in case you are wondering it is about a foot tall. So as I said I gave this one away last year, now I need to make one for me this year! Yep, found another red coat, actually a suit!

Linking to...
Blue Cricket Design
Savvy Southern Style  
Chic on a Shoestring 
A Little Knick Knack 
Freckled Laundry
My Repurposed Life
Remodelaholic
Tatertots & Jello 

Saturday, October 22, 2011

Halloween goodies!

Just thought I would share a couple Halloween things that I made for the craft show.
This wreath is the only Halloween wreath I had left so guess where it's hanging now? Yep, on my porch, creepy!
I coped this off of a blog but I cannot find who's, so if you know tell me and I will be sure to give credit where credit is due! I did make a change to the sign.
And these are left over pumpkin pillows, I had to have some too, can't sell all the cute stuff! When I posted some of these before people yelled at me and said they are not pumpkins, see the stems.....duh!
And a floral arrangement I had left, lovely and fallish for your Thanksgiving table! If you see anything here that you want to buy send me an email and I will get it in the mail to you lickety split!

Wednesday, April 27, 2011

Can I call this a wreath?

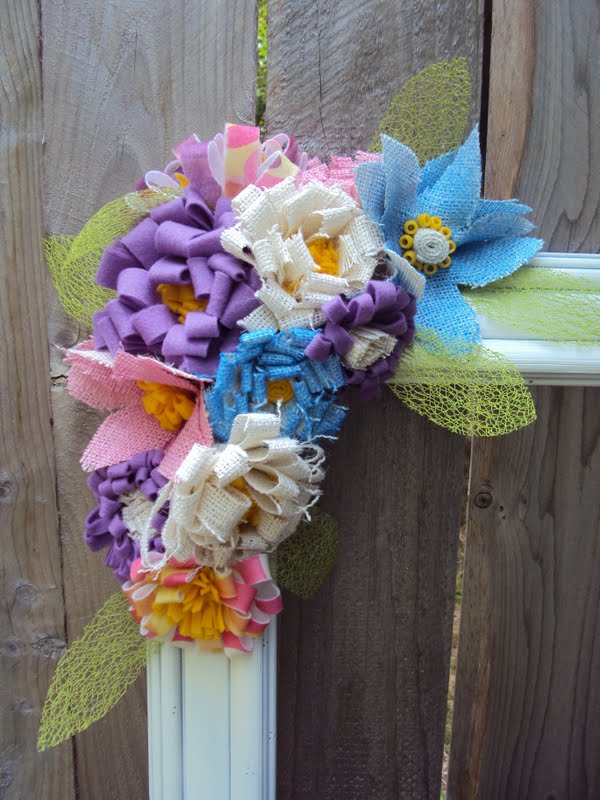
Recently while browsing around blogland I happened onto one of my favorite blogs and instantly fell in love! Amy at Positively Splendid has one of those blogs that I could stare at for hours. She has created the cutest little flowers and I had been making plans to make a wreath but didn't have all the details worked out, well that was until I saw her flowers! Here is what I created....
She is the best at putting together a tutorial so I am not going to show you how to do what she has already done so well. You must go and check out how to make these, they couldn't be easier or more fun! In the picture above the blue one at the top and pink at the bottom are a different kind of flower. I'll show you how I made those.
I cut out a simple flower shape and traced it onto some off white burlap.
I then took this Maya Mist paint and sprayed the burlap. If you don't have this stuff I really think you could water down some acrylic and make it work. What you can't see is this has a bit of sparkle to it.
Put a blob of hot glue in the center of the flower, or somewhat center, this doesn't look too centered!
And then from the back side of the flower just squish it all together so that the flower now has depth like a real flower.
I should have told you this first! Whenever I am working with hot glue I ALWAYS HAVE A BOWL OF ICE WATER NEAR ME!!! When you get burned, notice I didn't say "if" you just stick your finger in the ice water pronto and the glue will freeze and you don't have to sit and wait for the glue to cool so that you can peel off your burning flesh! It is a glue gun girls best friend. Especially when working with burlap that has a loose weave and lets the glue ooze out all over the place! Back to the tutorial...

I did the centers of my flowers all different but on this one, I rolled the the folded burlap in the middle and then glued the yellow beads all around the edge.
As I said I made all different styles and colors using burlap and felt. I also changed up the sizes from the original directions Amy gave. And I glued them on a Goodwill frame, added some leaves out of this cool ribbon I found.
Isn't it fun? So what do you think, can I call this a wreath?
I found some printed felt and made one out of it, I think it's my favorite.
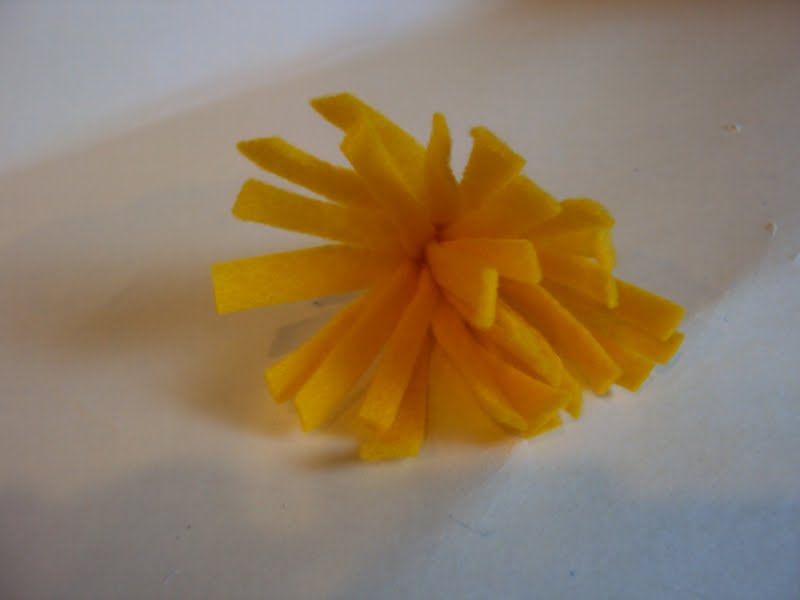
The center of this one is a little different. I used the same idea as Amy's but didn't fold, just made cuts.
Another one I painted and made a tiny flower for the center.
More printed felt.
I can see these in red and white on my Christmas tree!
But as pretty as all of these are, I still wasn't happy with my final product, so I had an idea!
I cut out 2 butterflies, made his body and antennae, then glued them together.
I actually ended up adding some of the same ribbon as the green leaves but in pink to the wings.
I found this adorable little quote that I just love!
And then I hung my wreath around it!
Sorry for these pictures. I decided to hang it in my entry hallway and it is difficult to get a good shot of it.
Anyway, I love how it turned out and I am addicted to making these flowers! Yes one MUST have a little sunshine, freedom and a little flower, even if you have to make it!
Related Posts Plugin for WordPress, Blogger...